Simulating water
Have you ever wondered about how to create a realistic looking water scene, like a medium-sized stream…
… I might have a how-to for you.

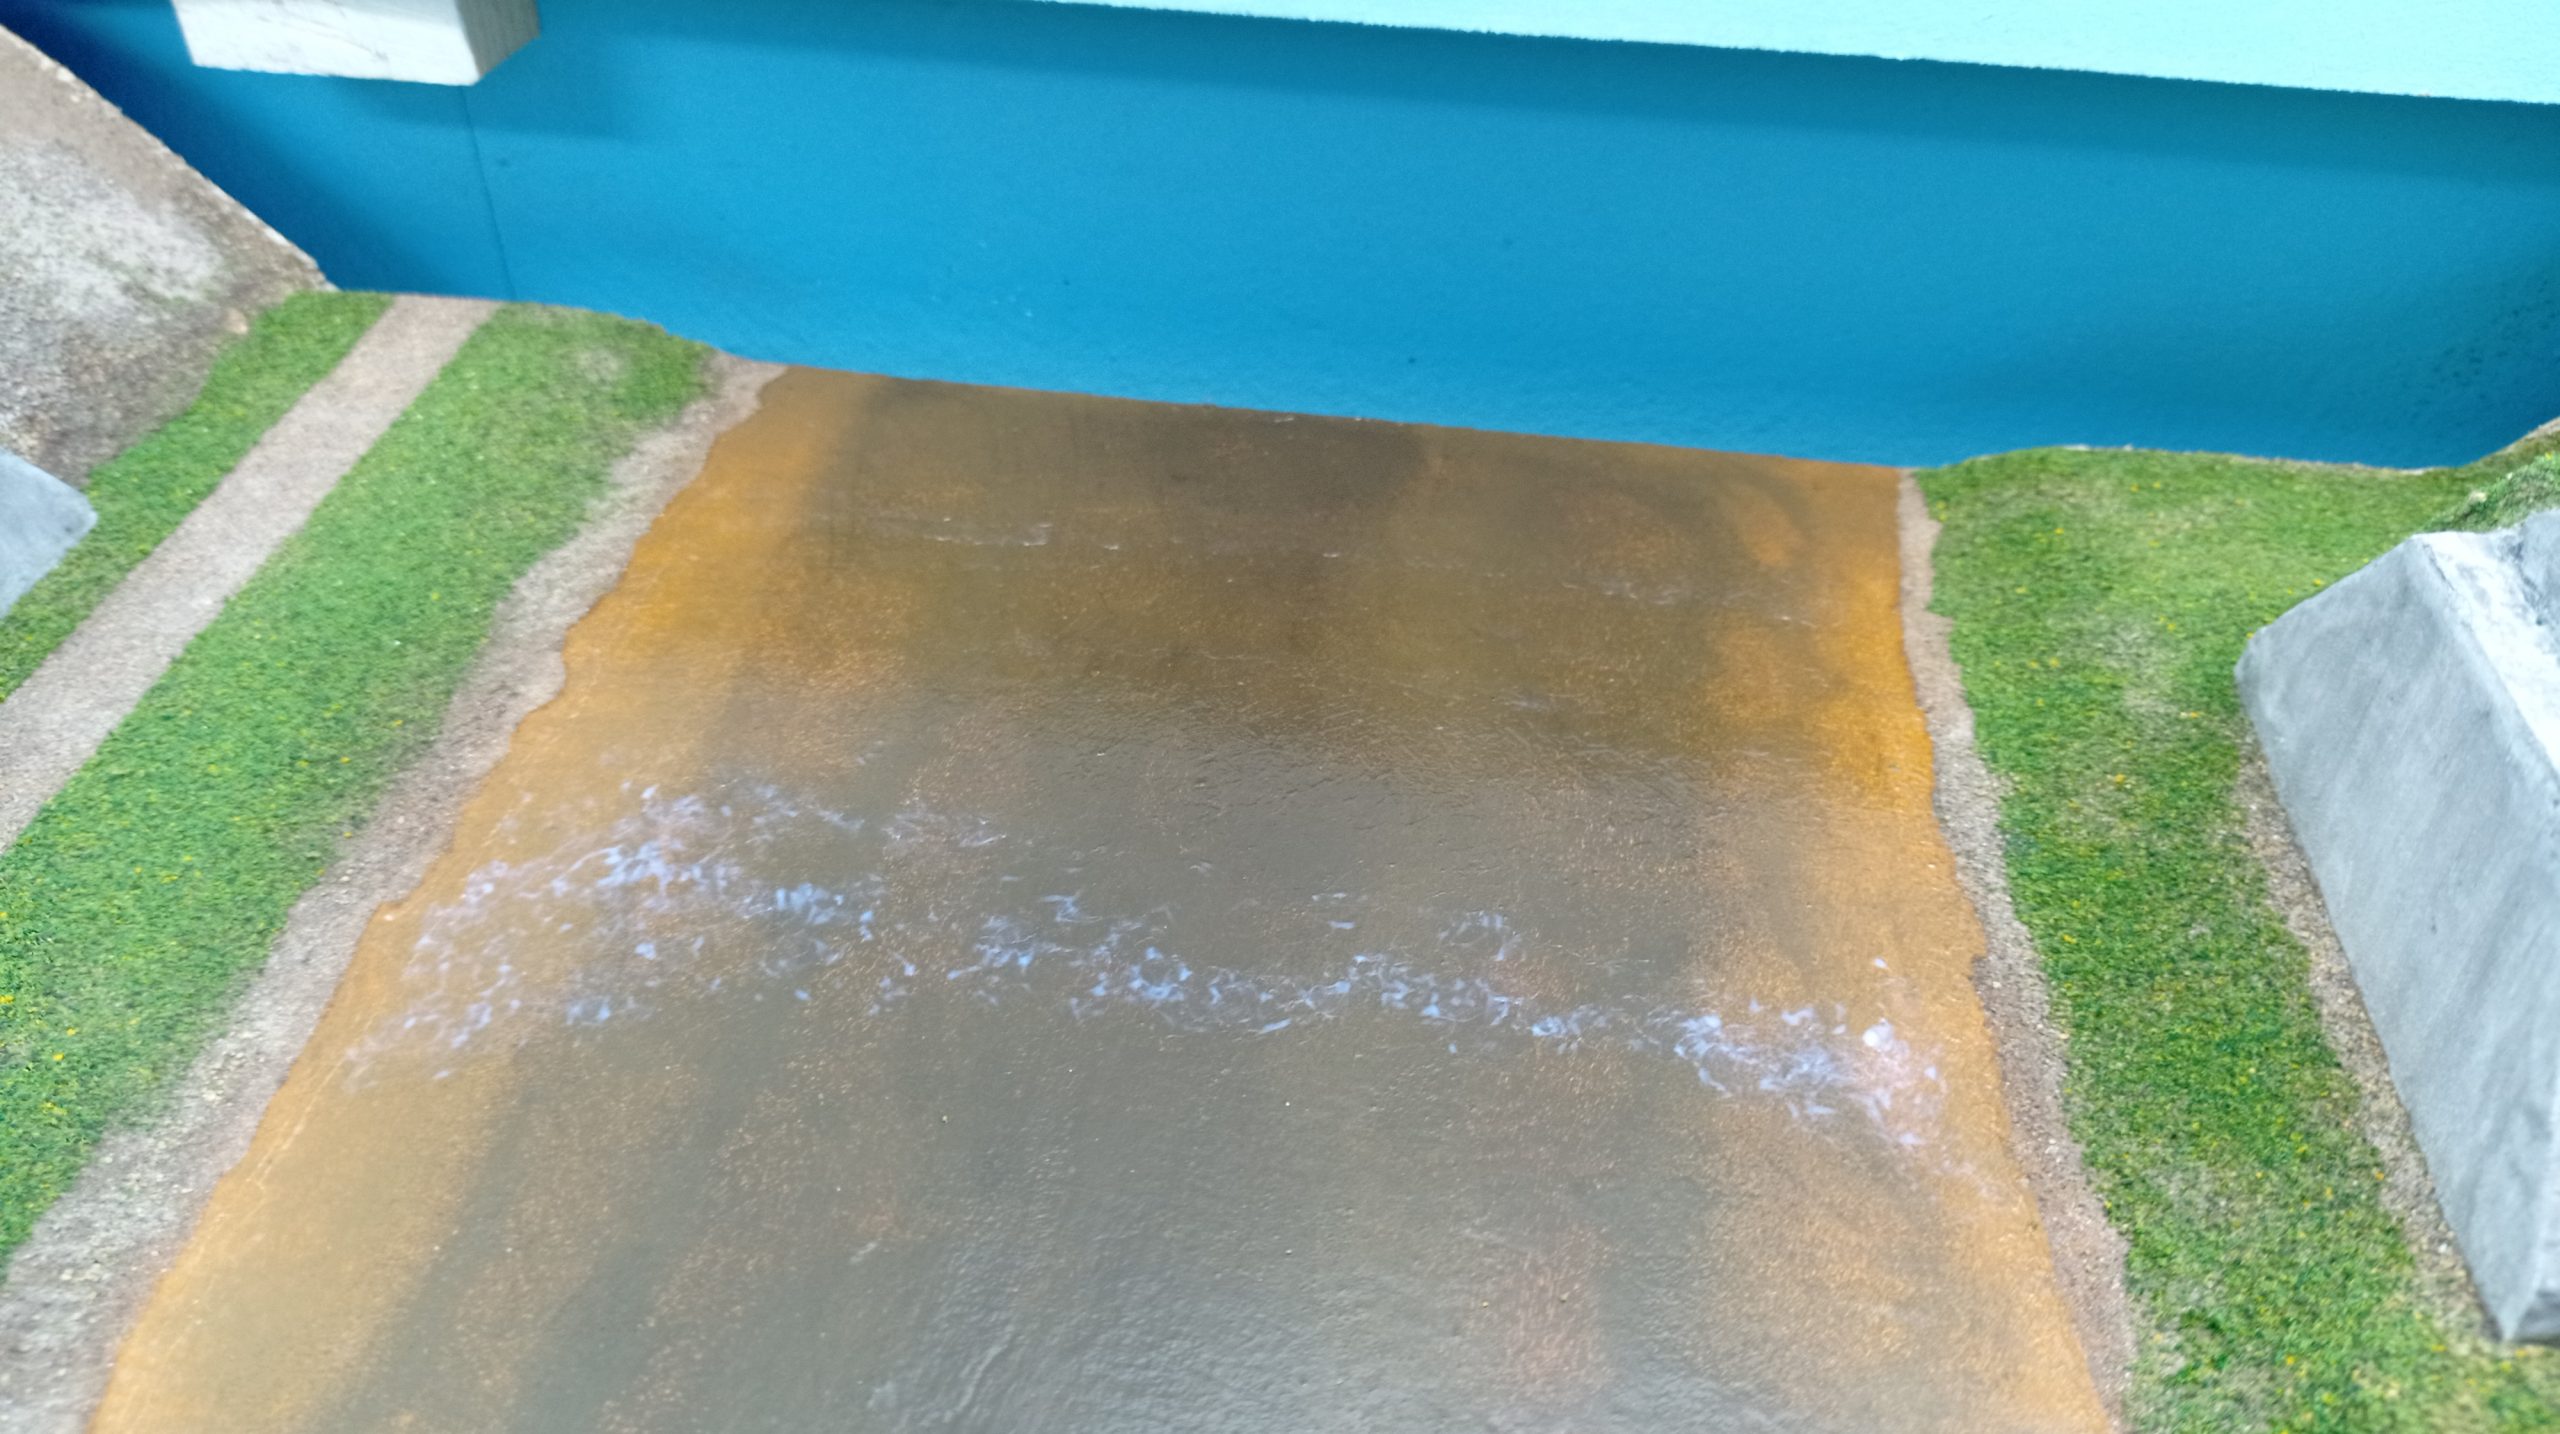
We start off modeling a smooth river base. I have a plywood sheet as a base and smoothed it out with plaster putty. Little sanding to get an even surface.
After this, I primed the base with some beige acrylic paint, working in streaks along the flow direction.
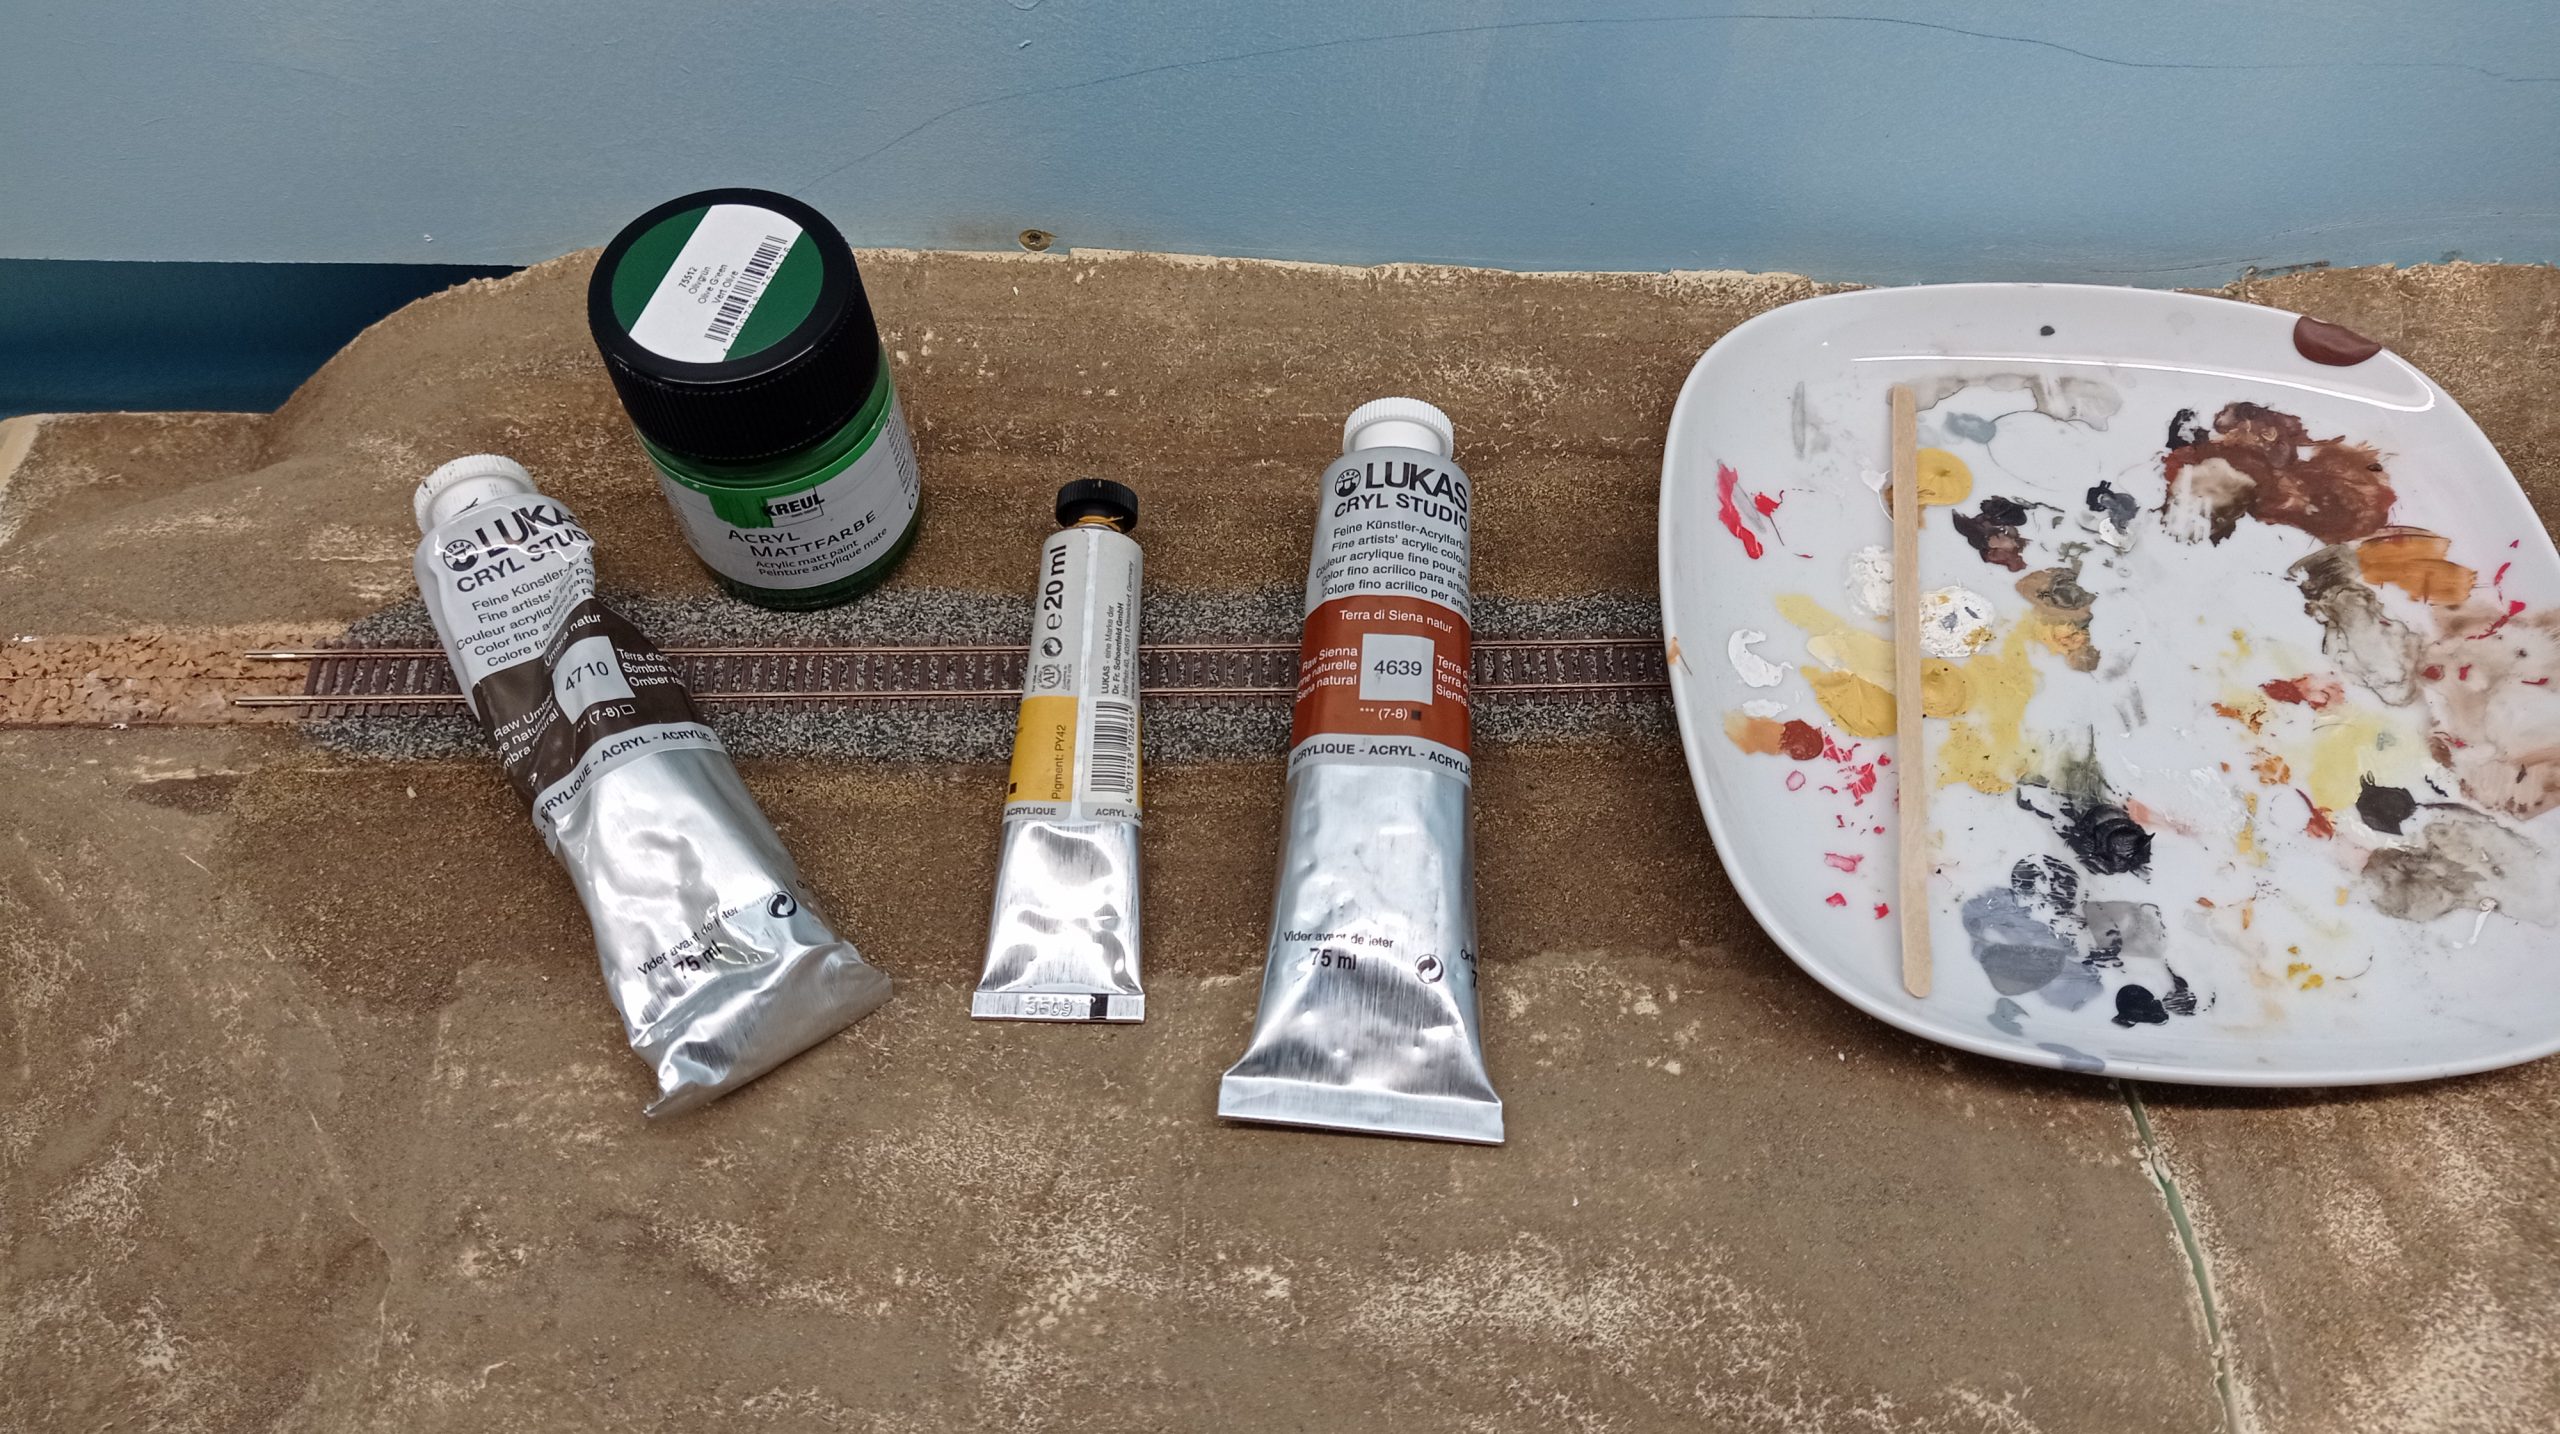
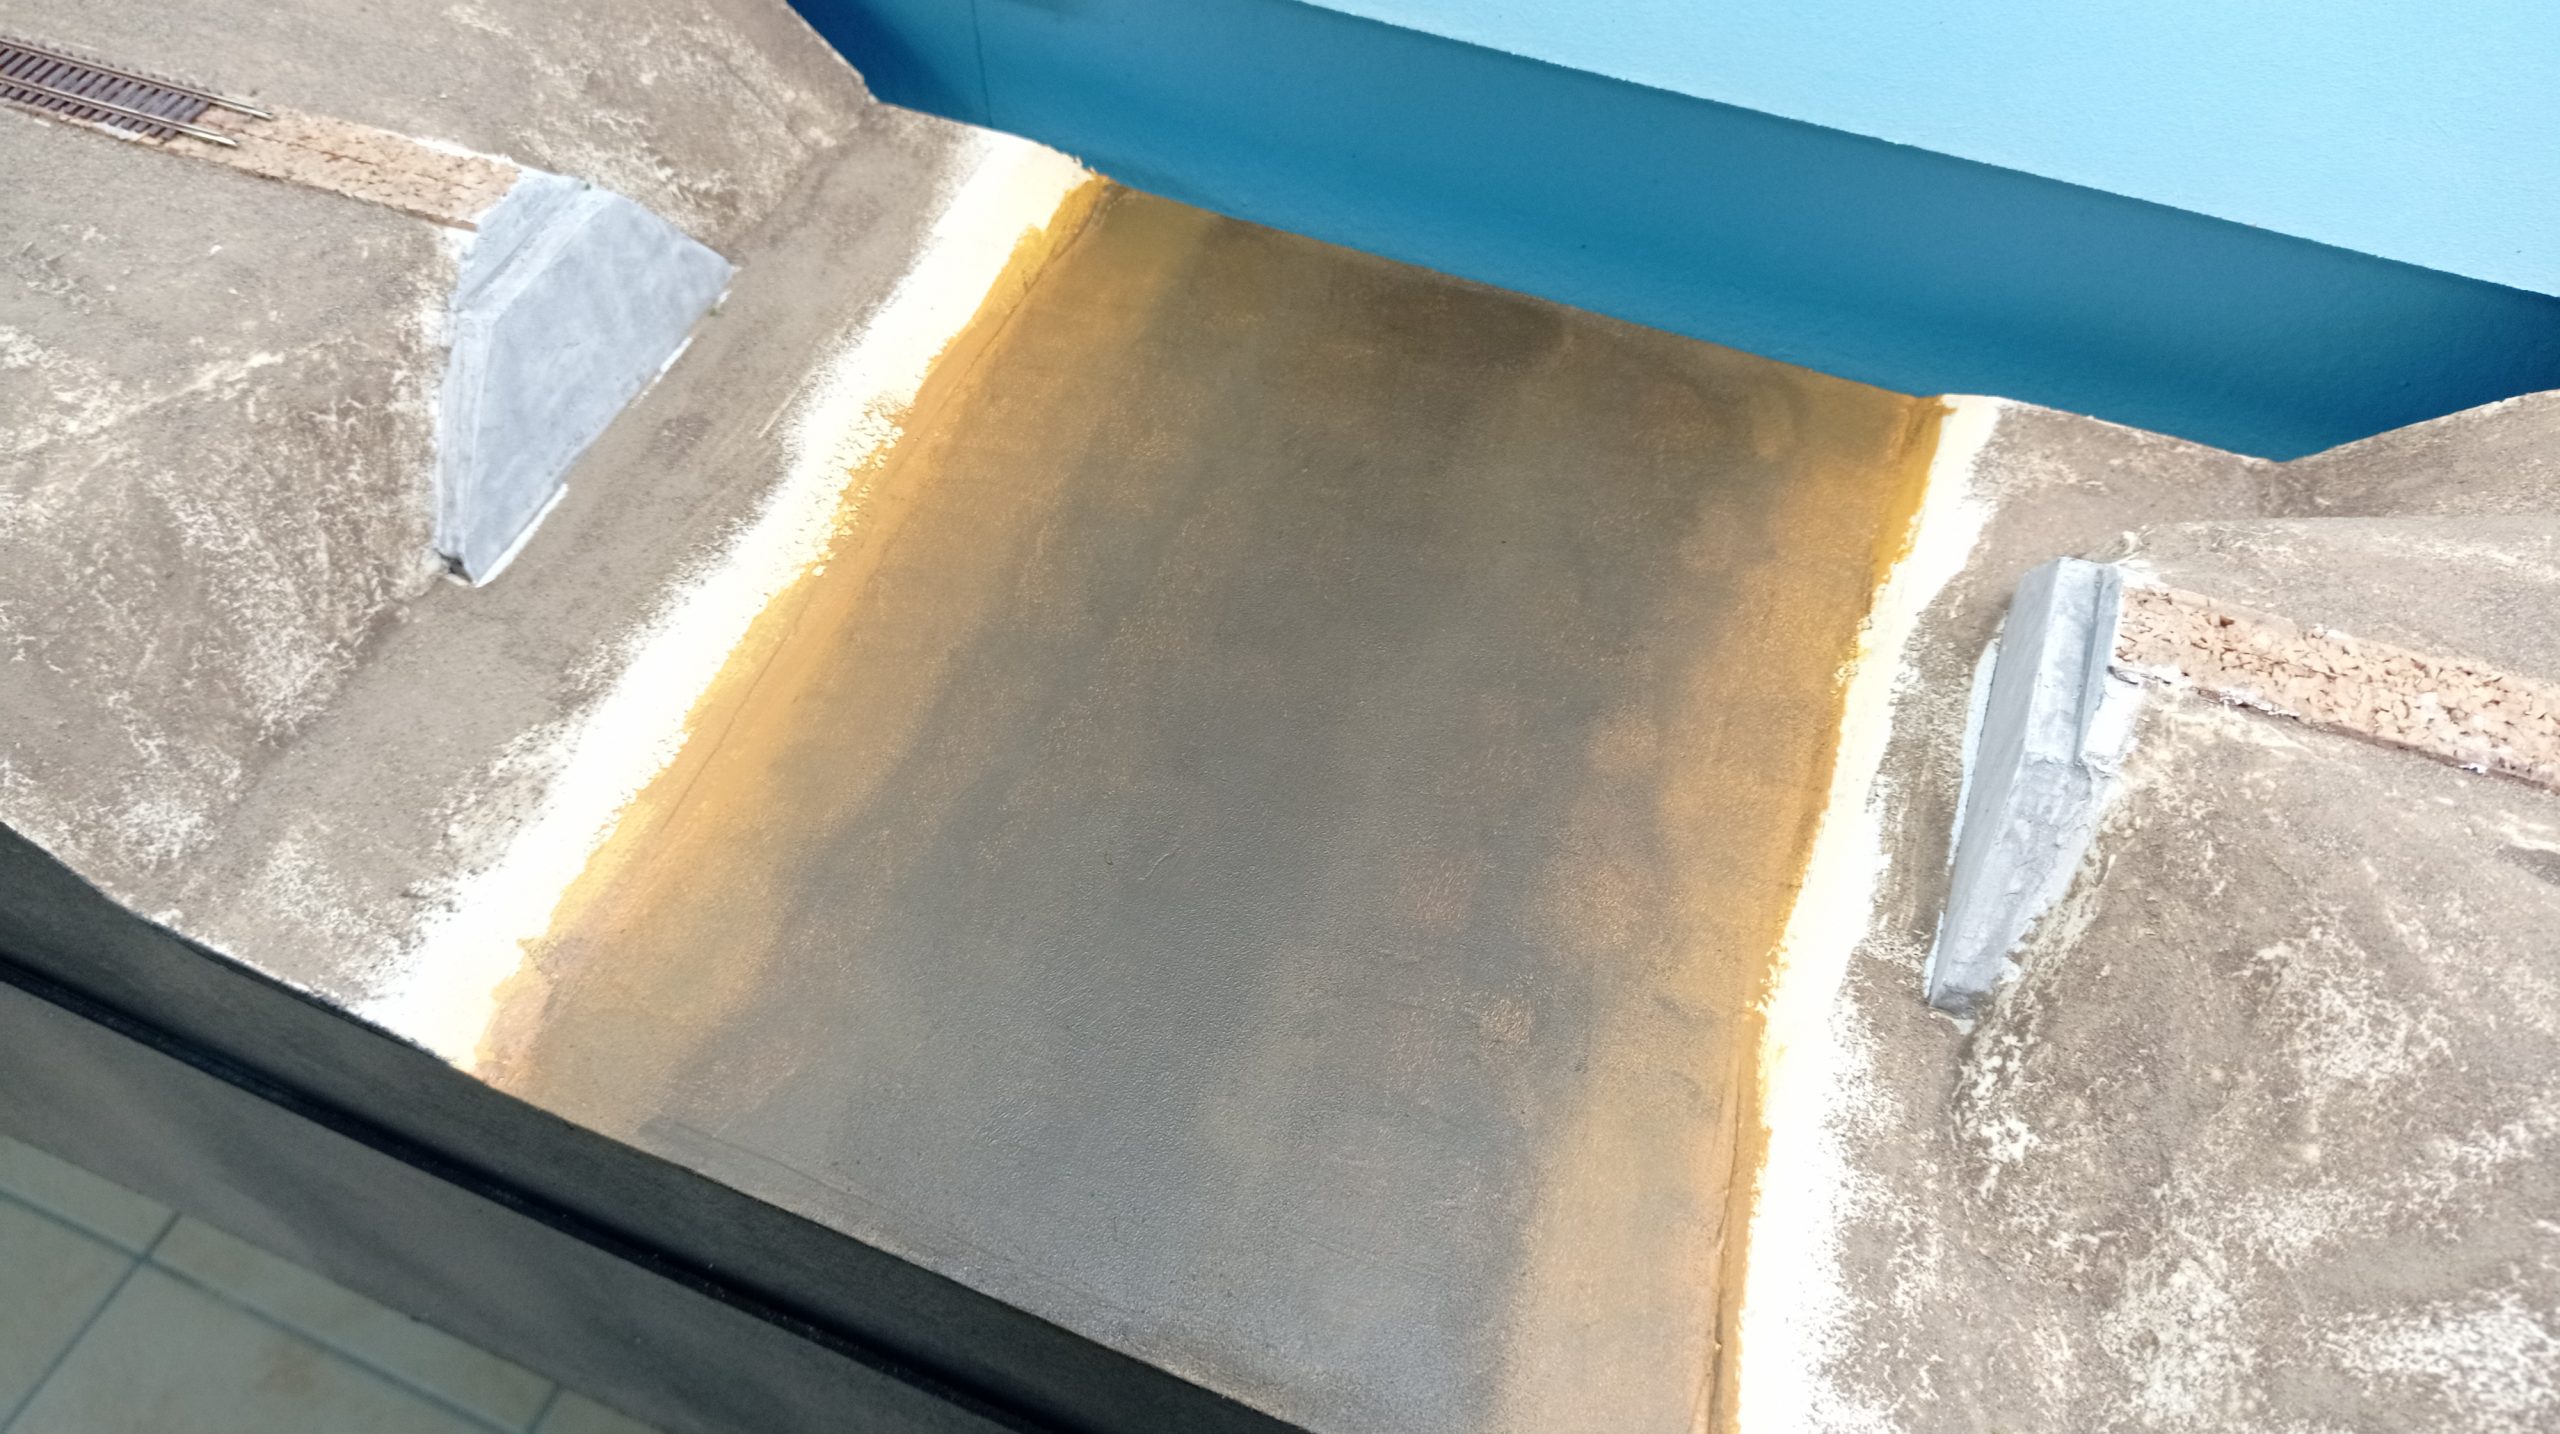
After the primer dried, I applied the water shading. I used Burned Umber, Raw Umber and Light Ocher and dabbed the colors on the base with a fine sponge, starting with the Light Ocher from the river seams.
Working towards the middle switching from Raw Umber to Burned Umber.
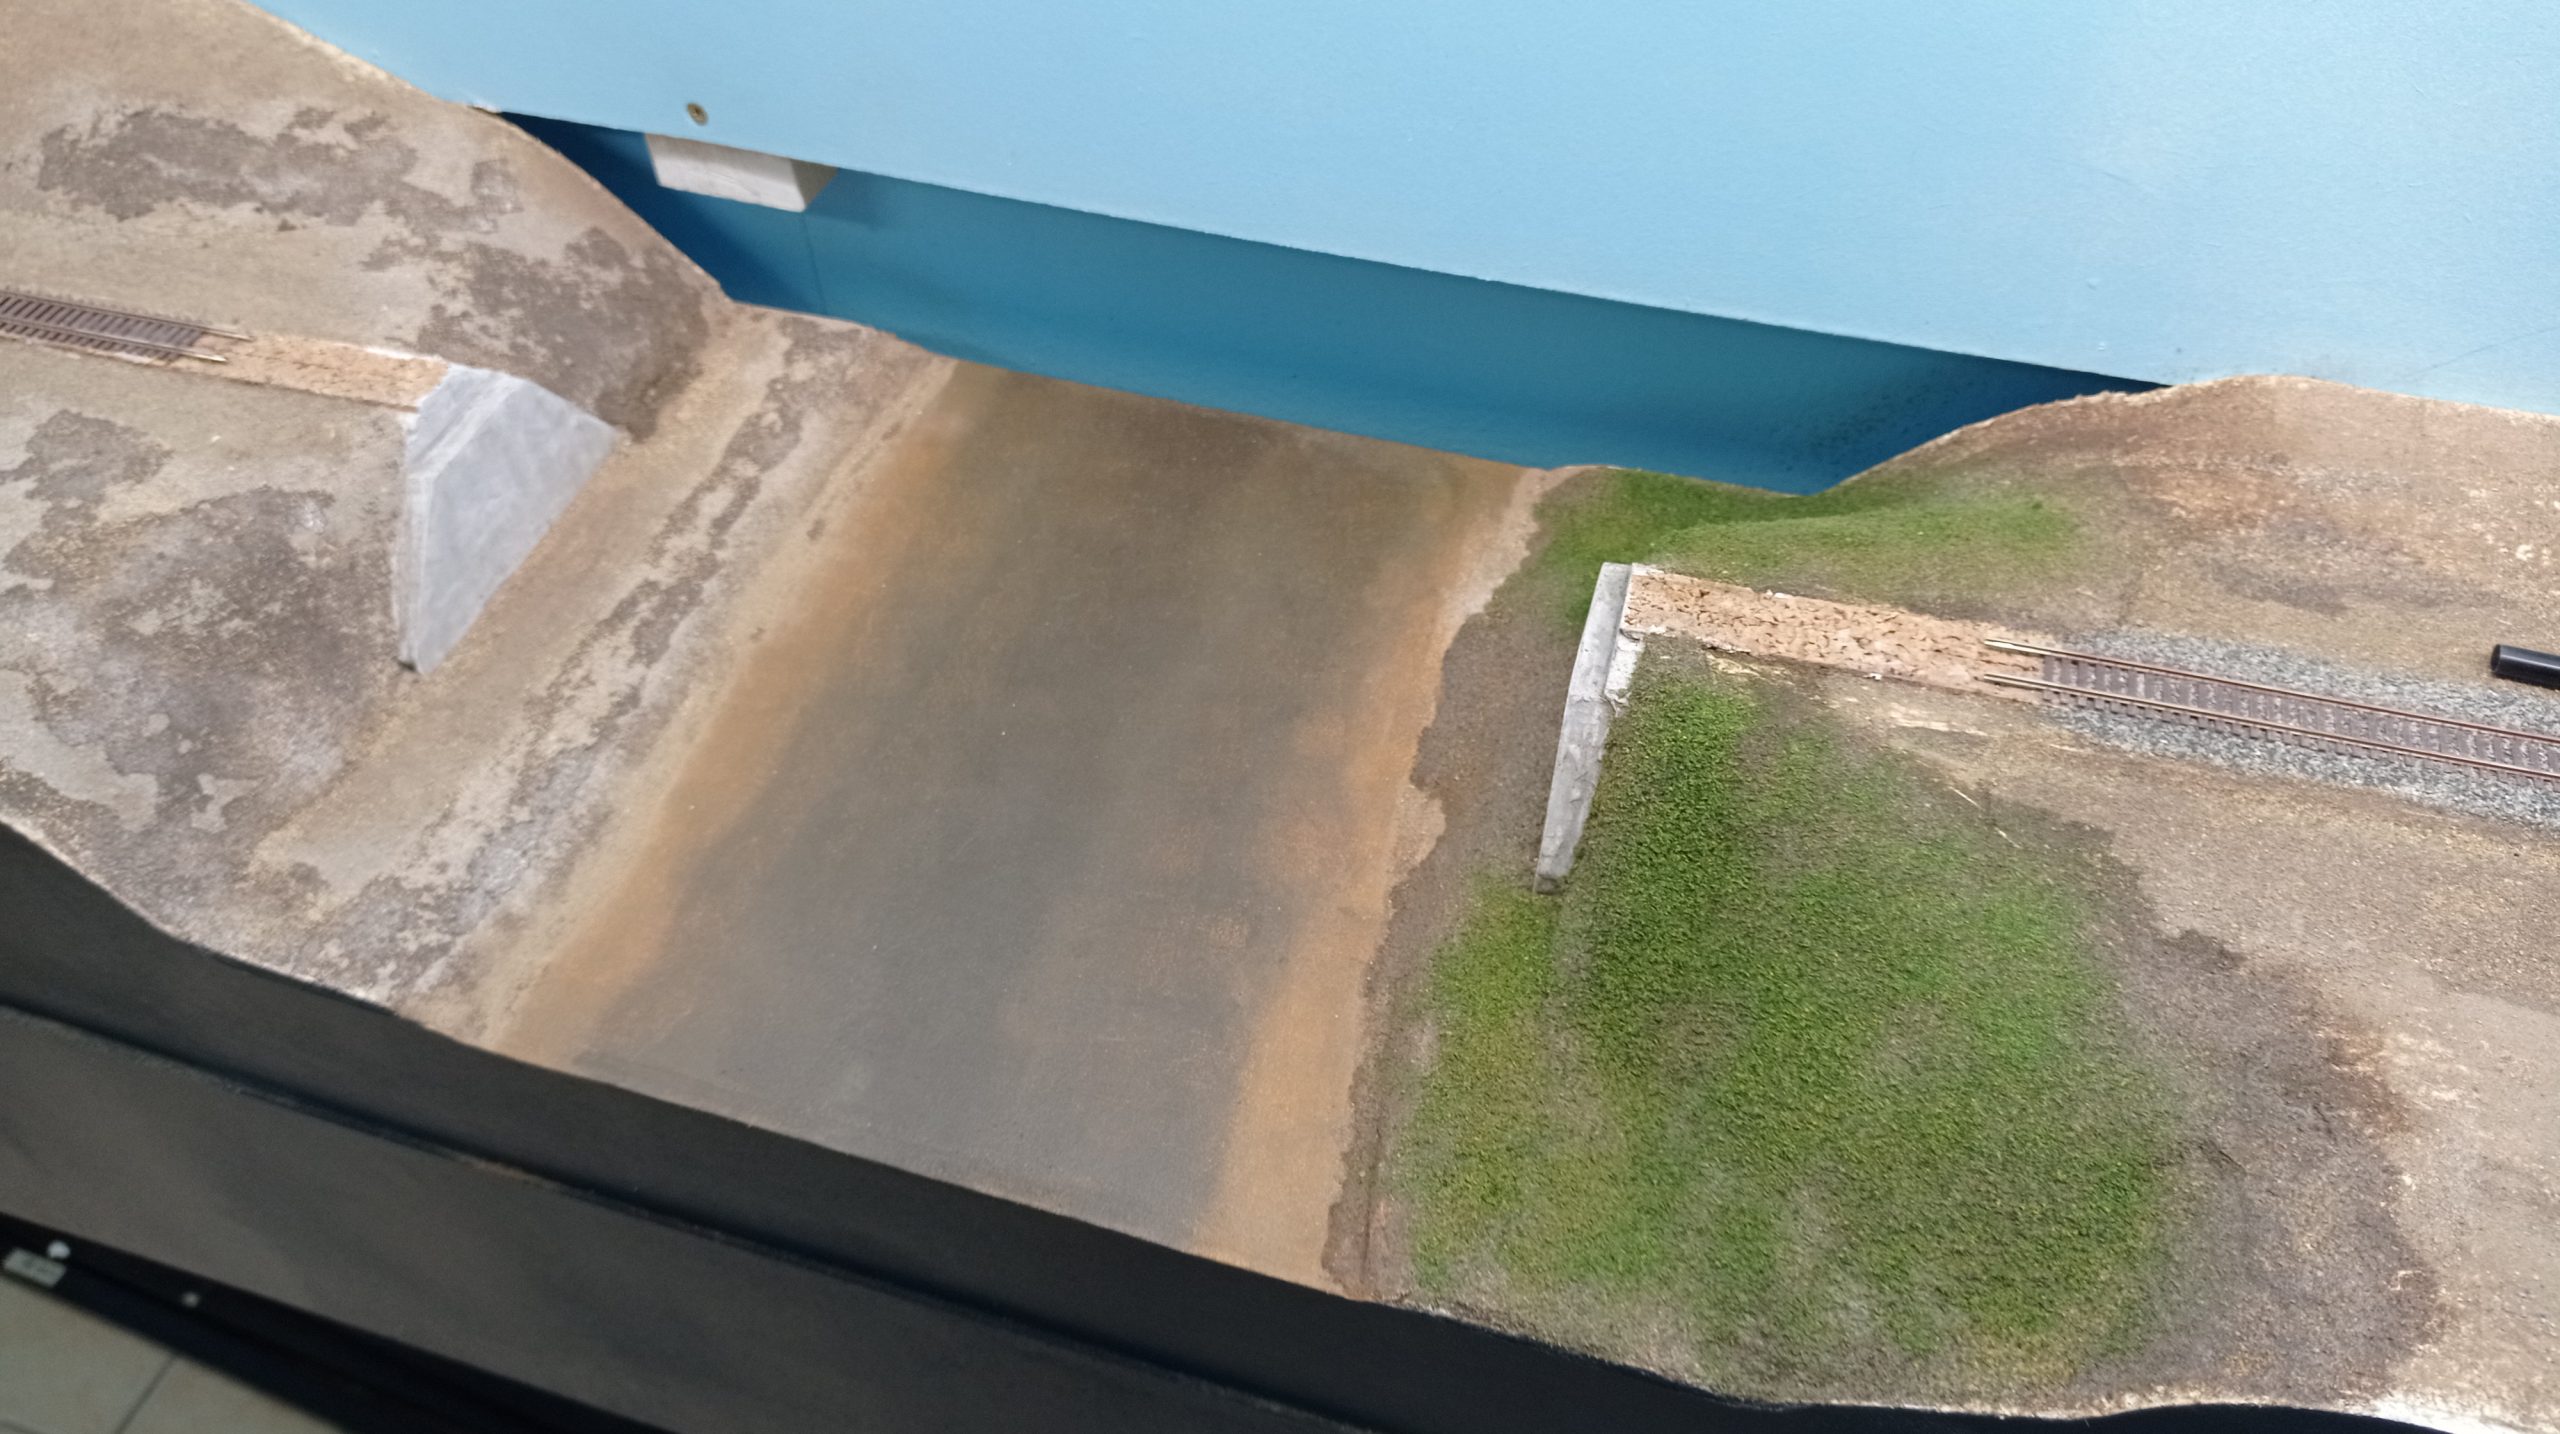
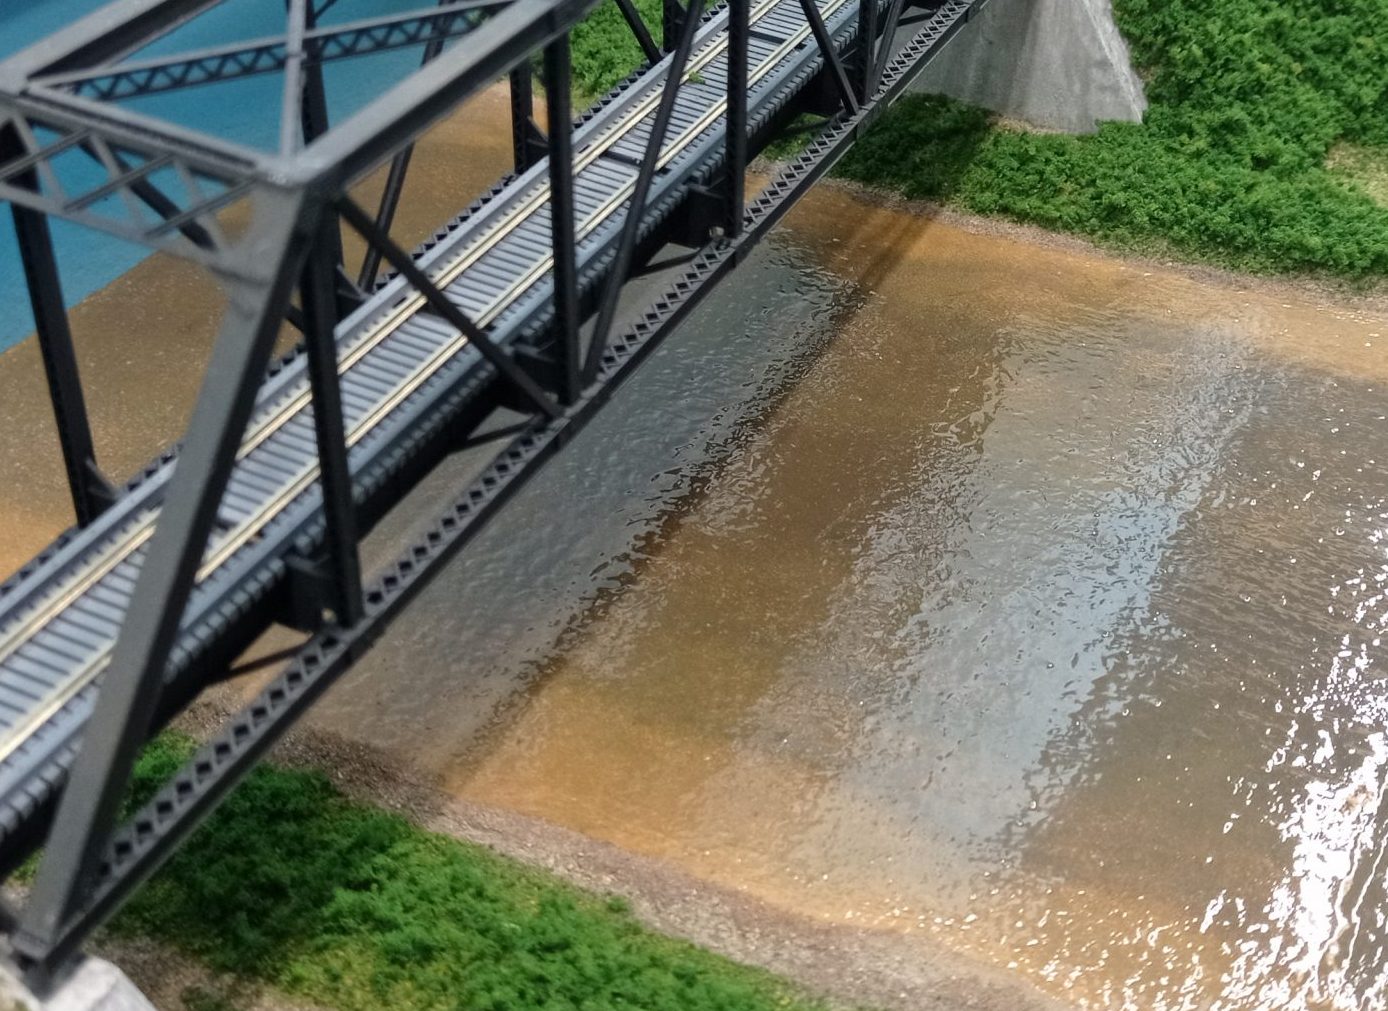
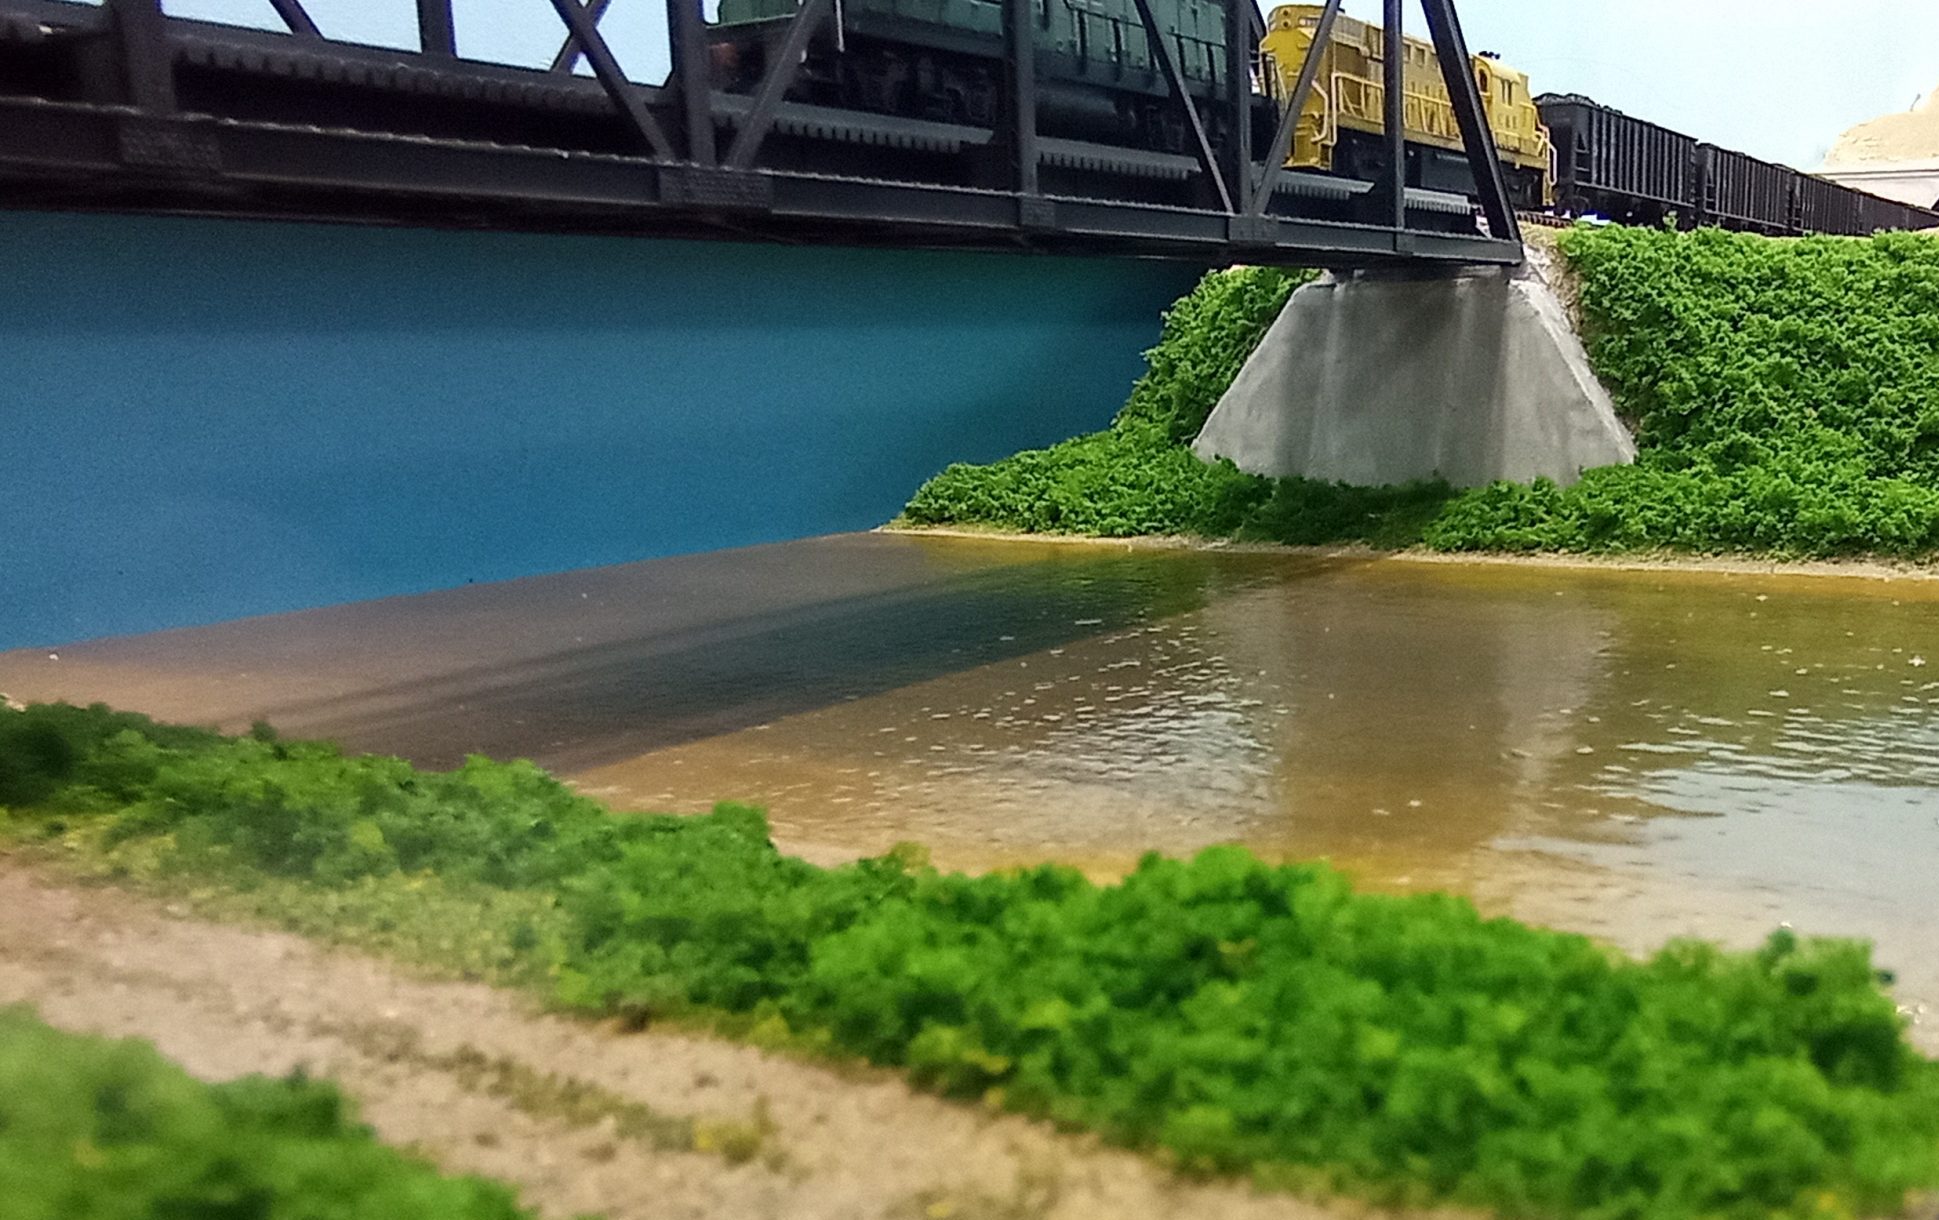
With the acrylics dried I started to create the water surface with a glossy potch medium.
Using a wide soft brush and working in thin layers from the seams towards the middle and from the back to the front – it starts to create some minor waves and ripples. I applied several layers, each after the previous has dried.
For some more depth in the waves, I applied one layer of a thicker potch medium in lines between both seams. For this I use a smaller brush and spread out the line of potch medium to the back and front a bit, keeping the line visible.
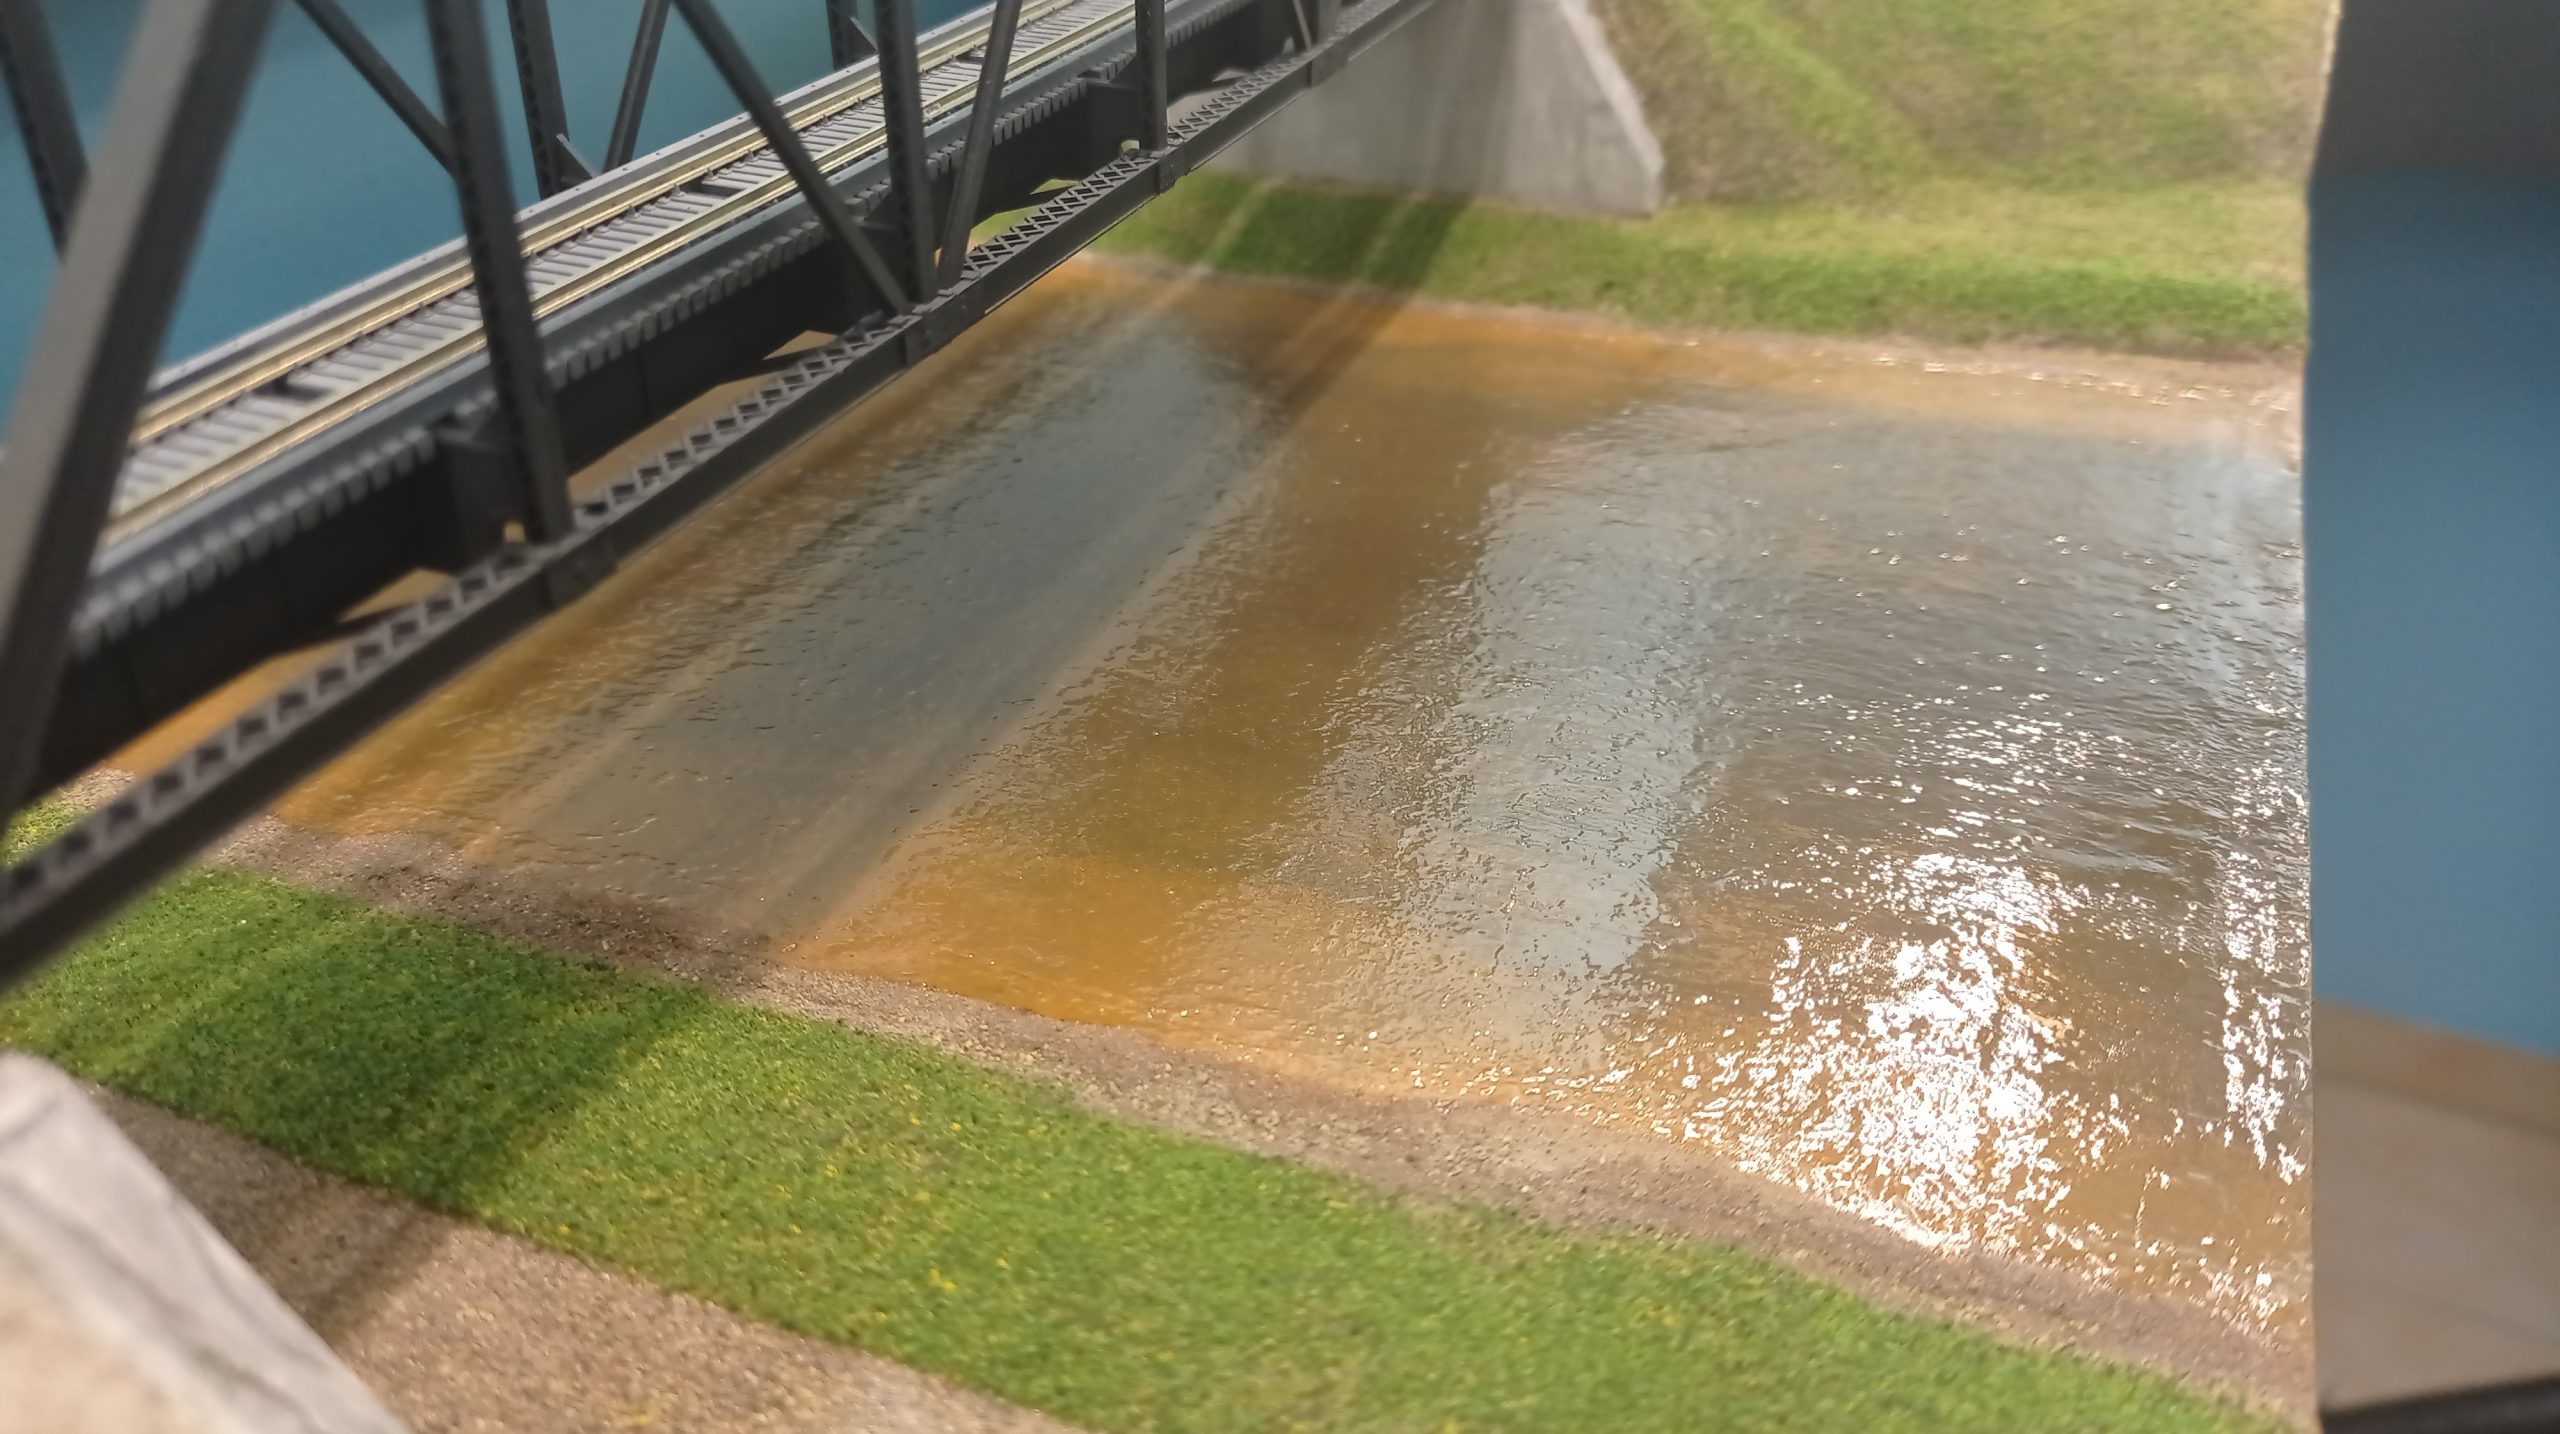
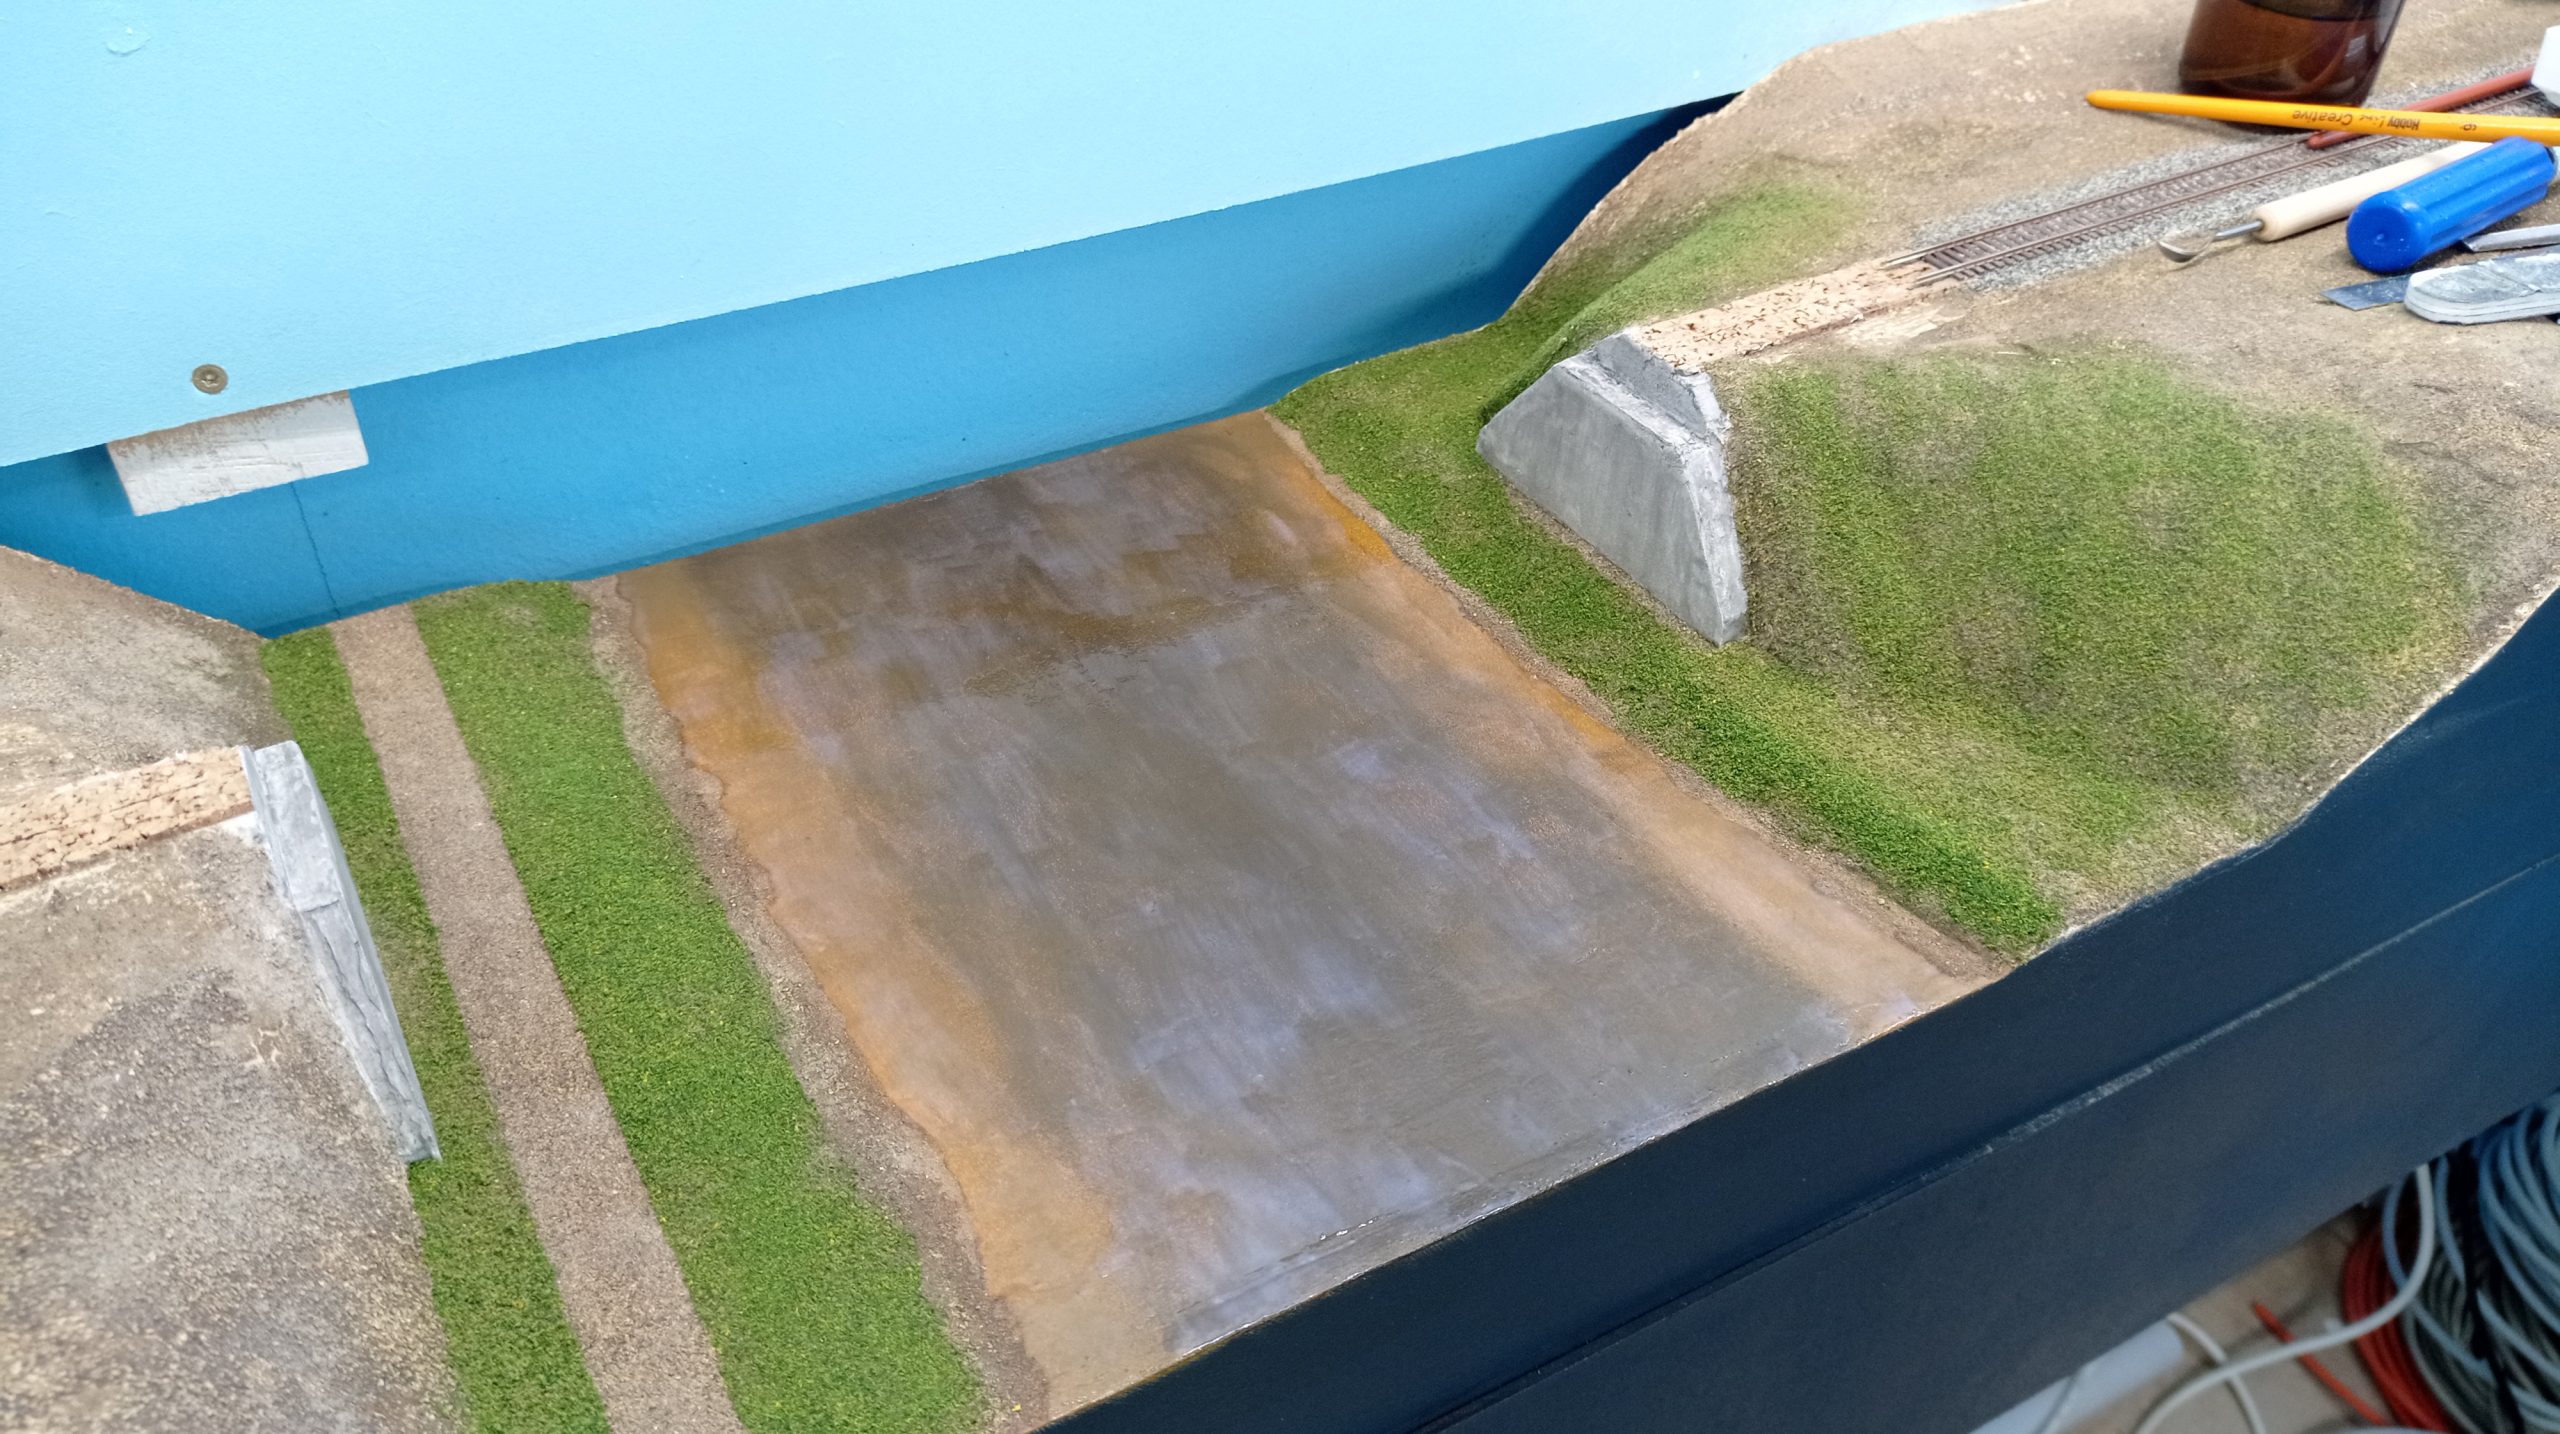
I finished the water with two additional layers of glossy potch medium to smooth out some ripples from the prior step and recreate the glossy surface.

By potch for the water surface, is that gloss Mod Podge?
Not excatly the same brand, but something simmilar to gloss Mod Podge.